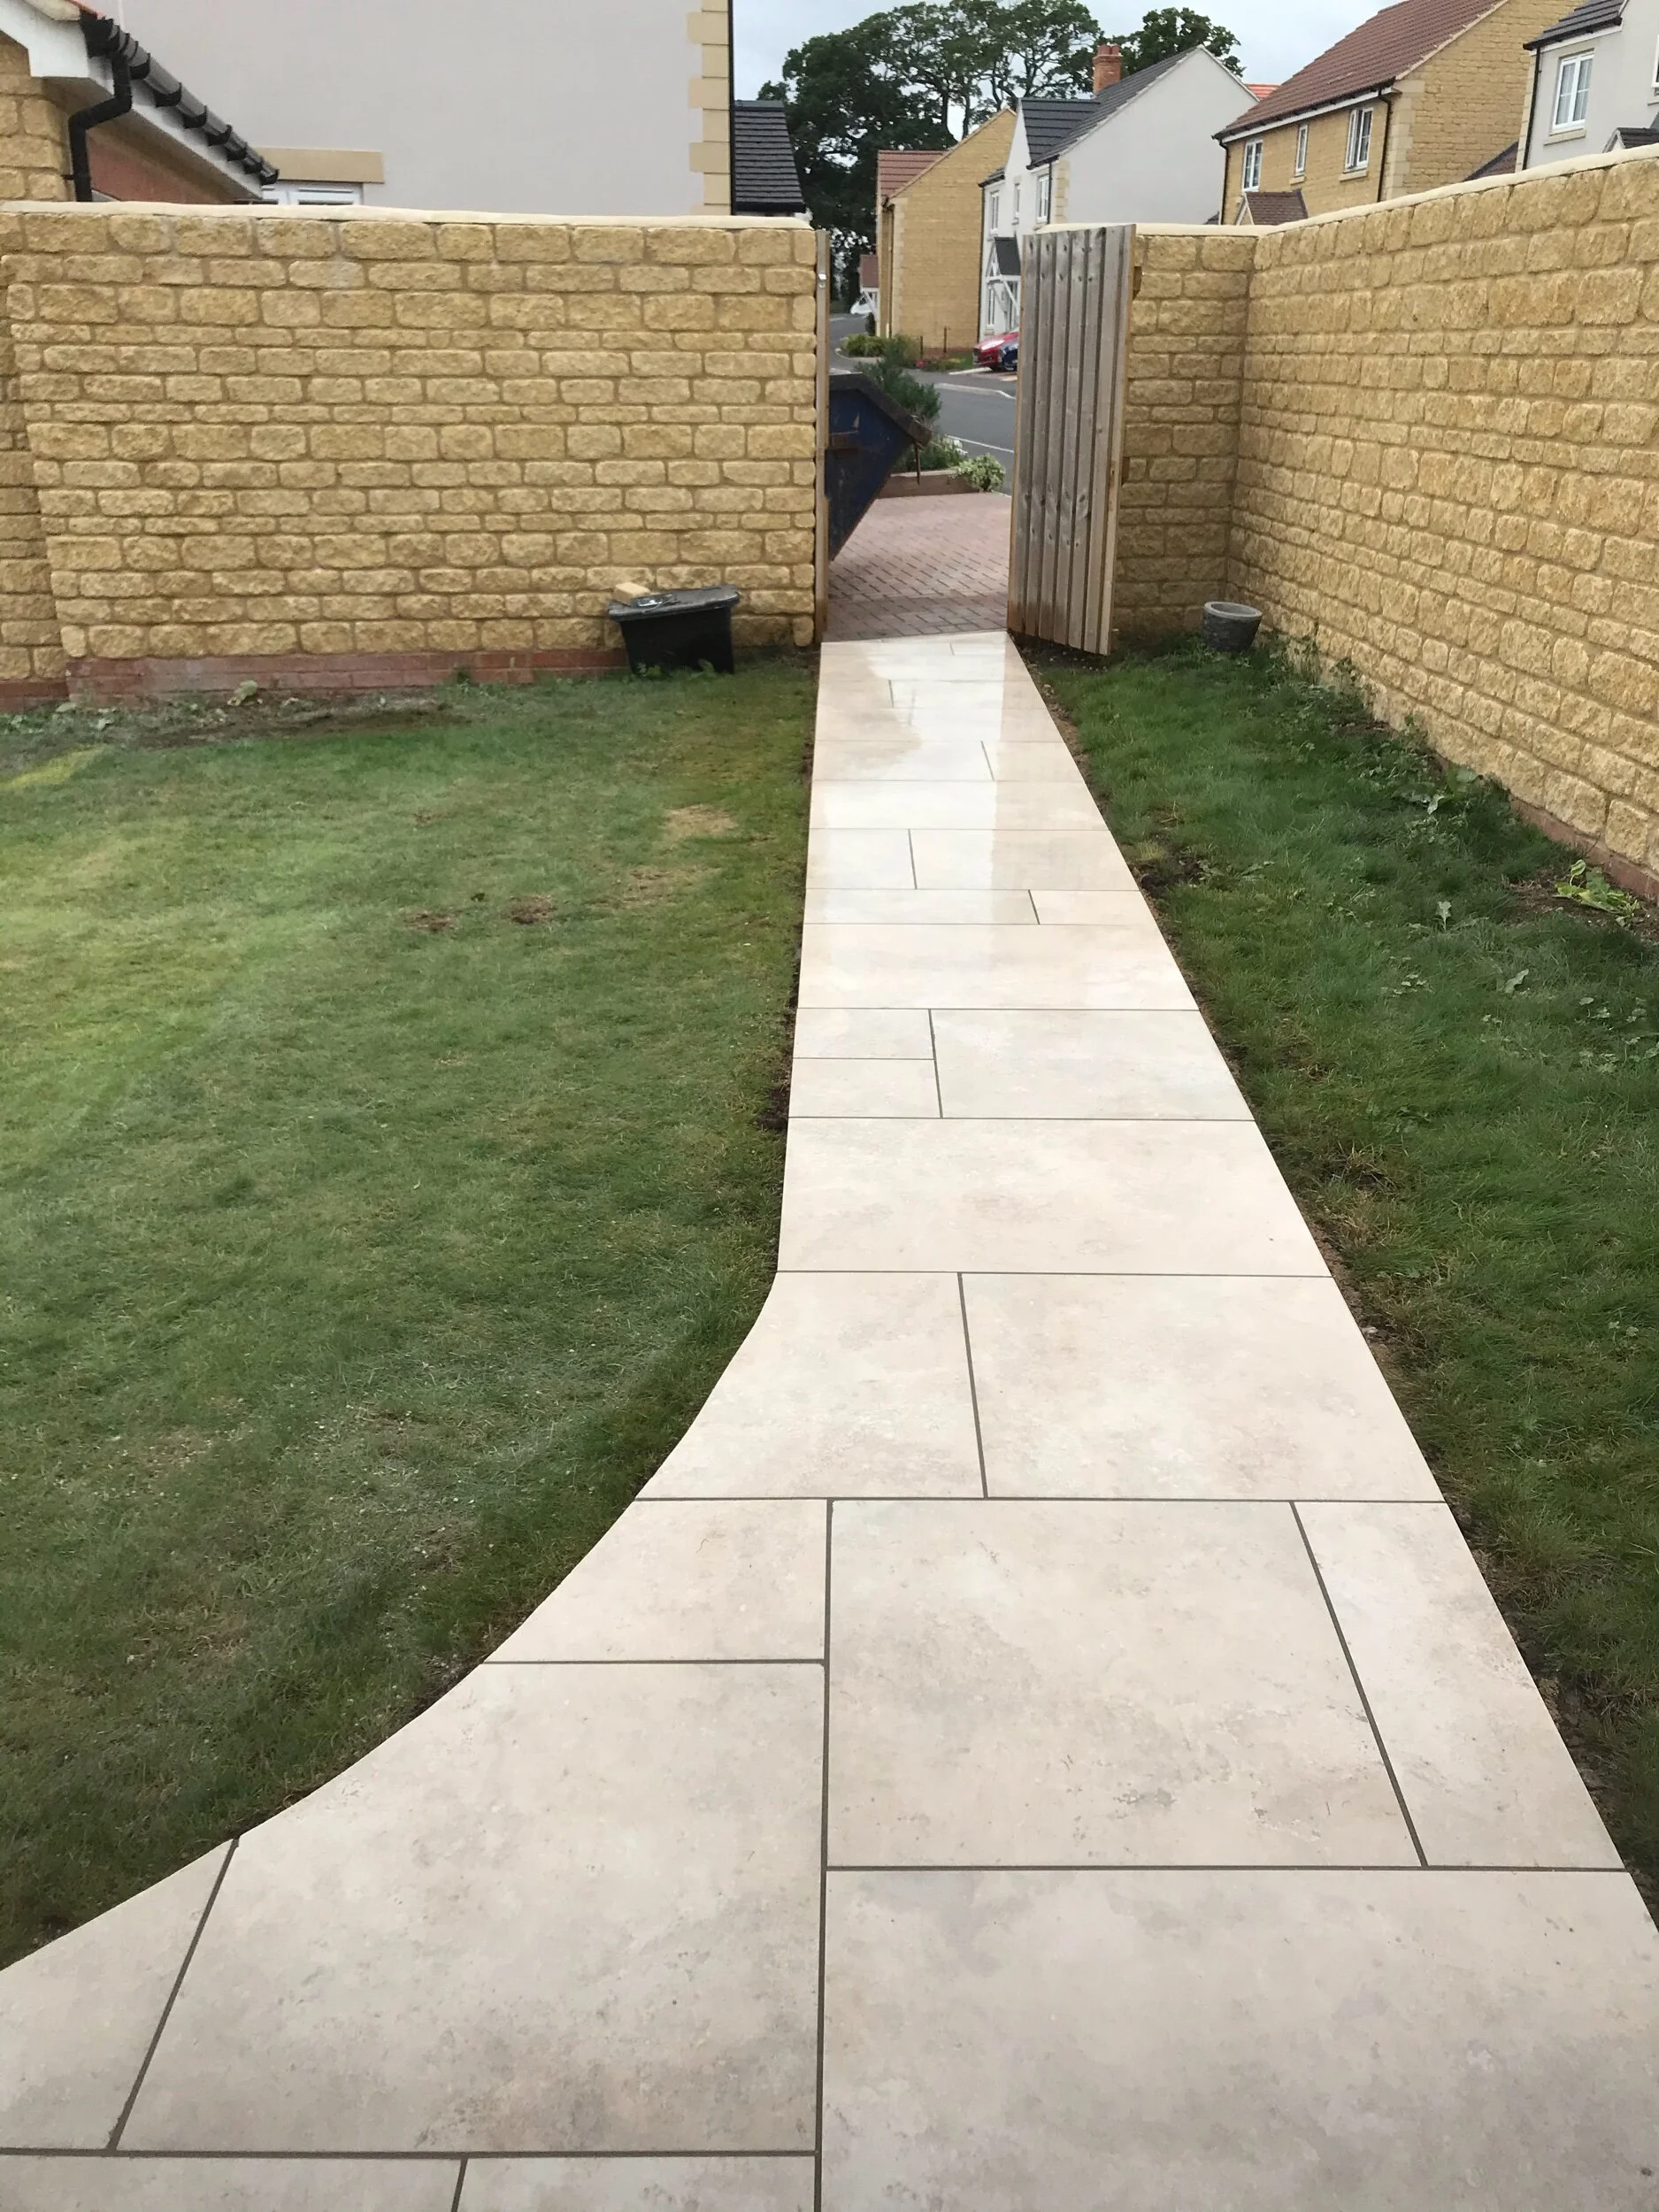
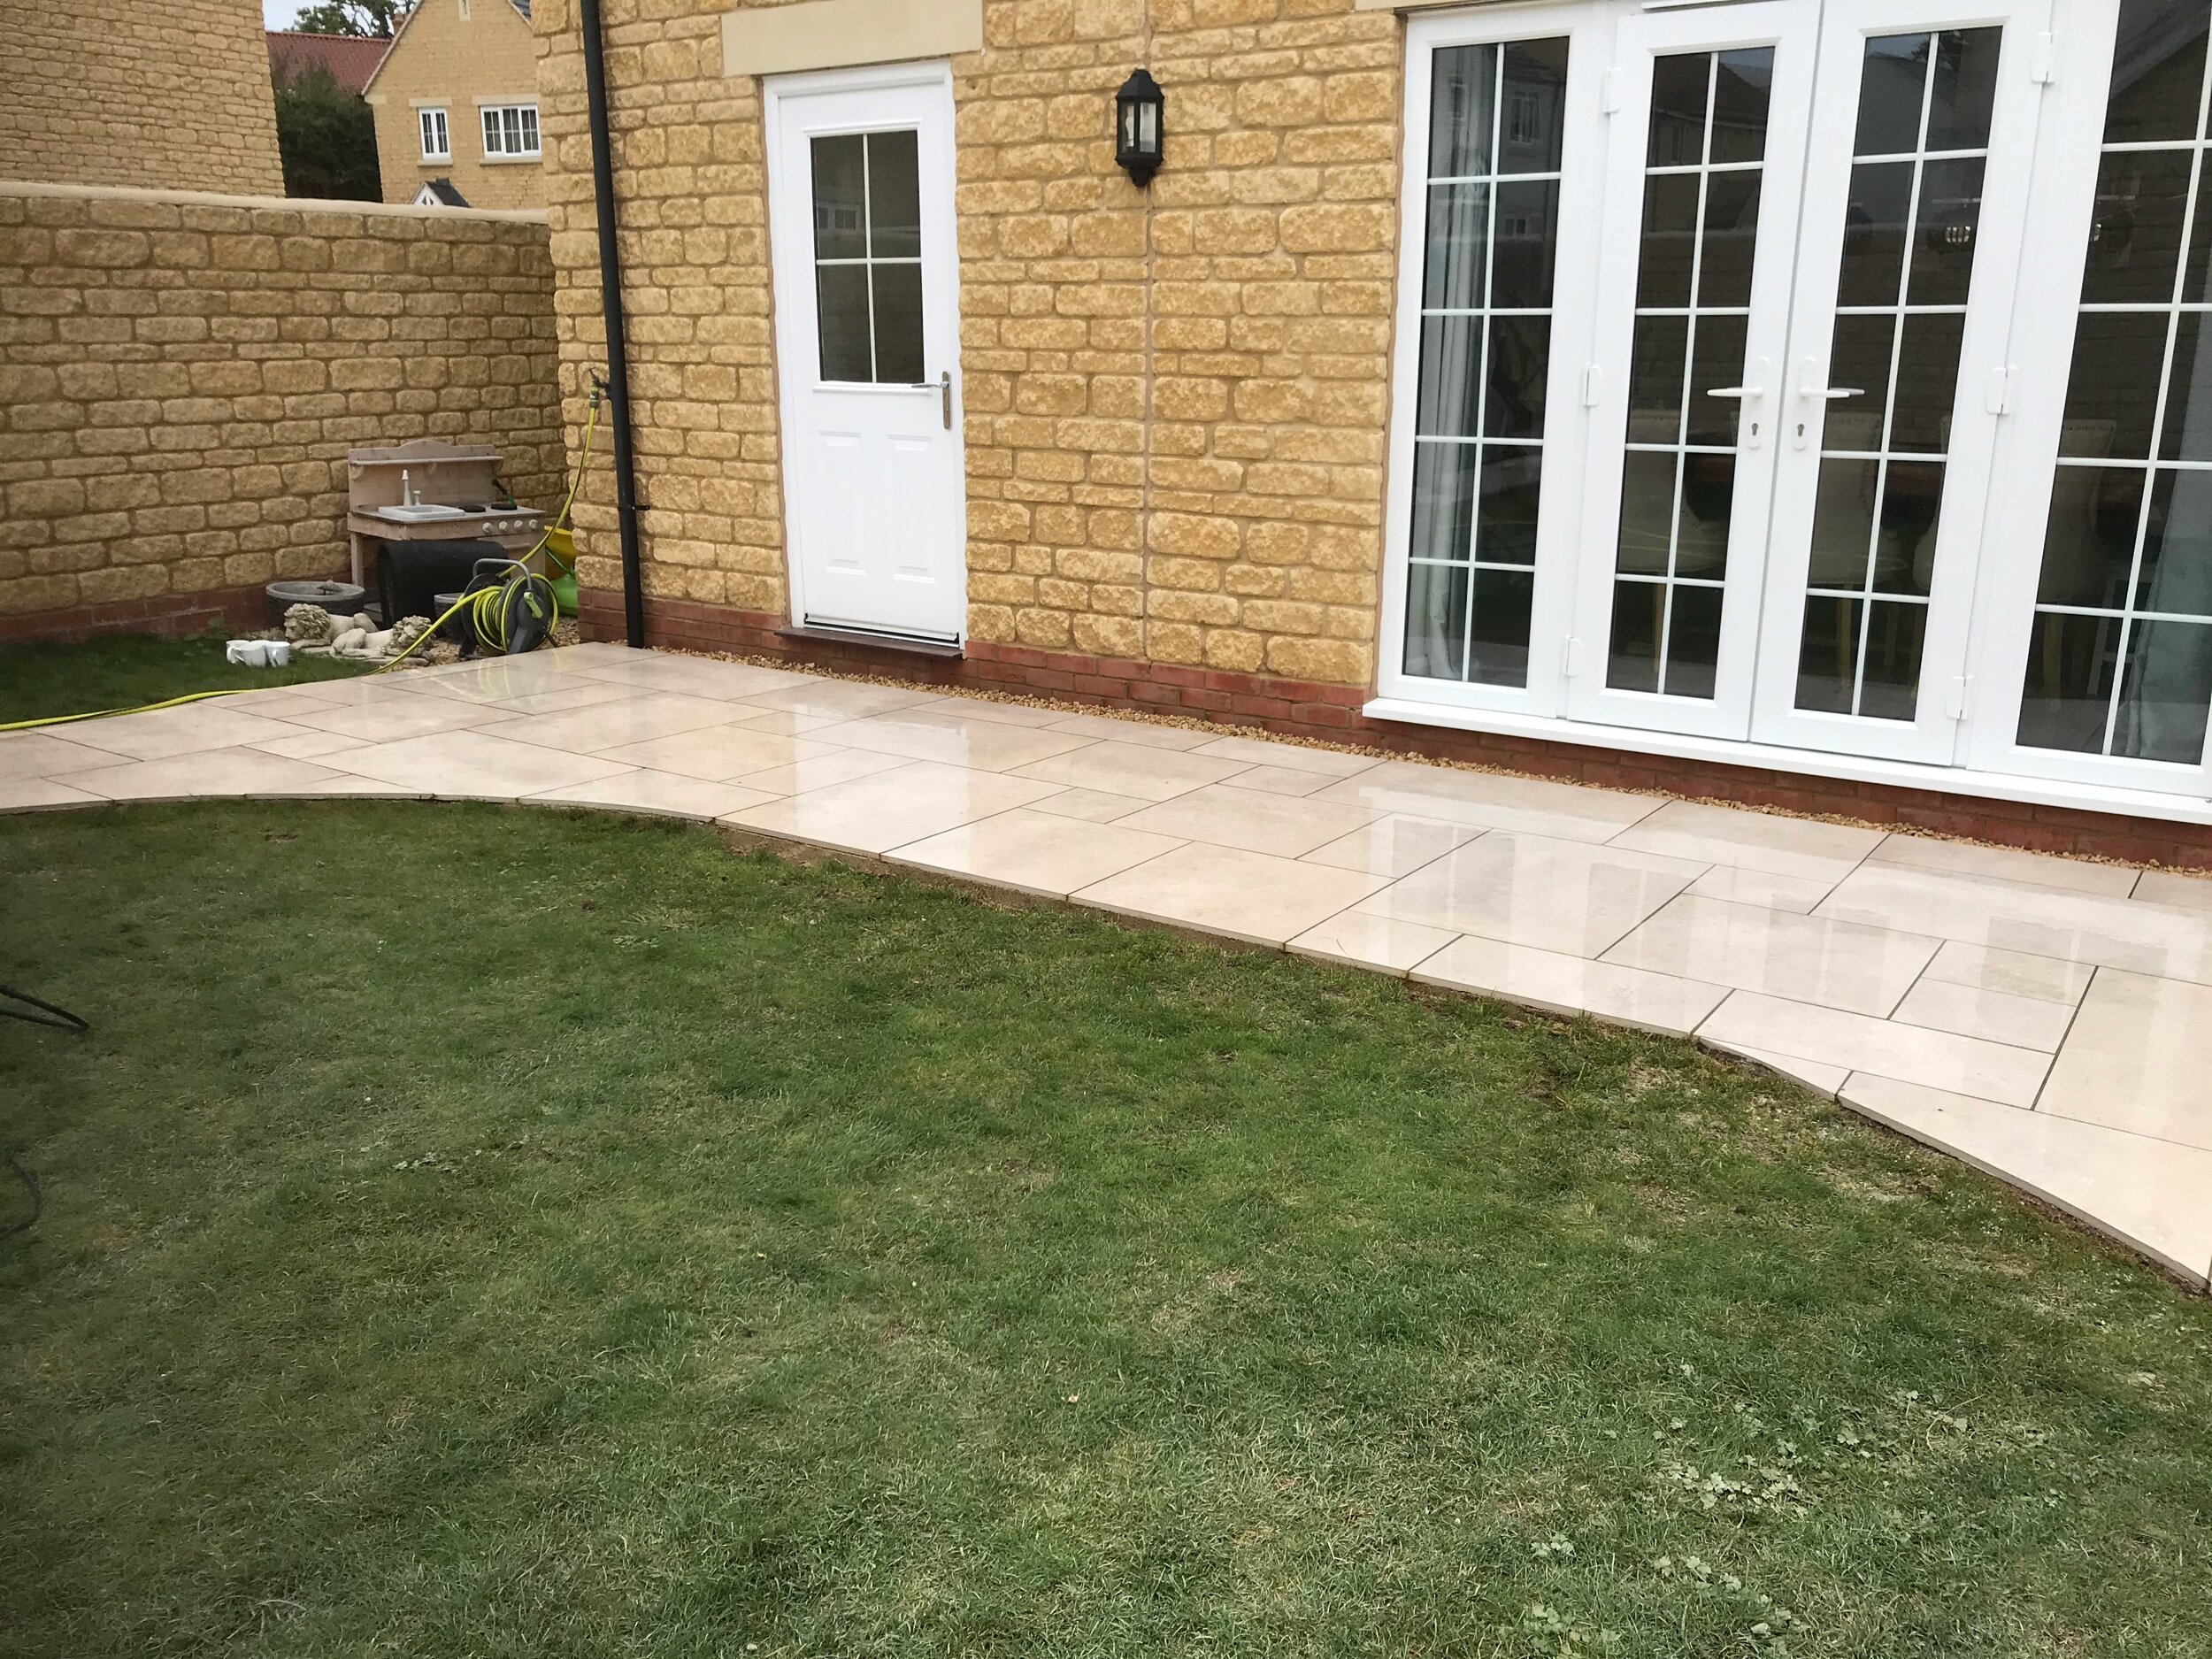
This project was to replace the existing patio and path and extend the patio . I used Marshall’s Symphony Senna in project packs and was pointed using Marshall’MEJG .


Living Sedum Roof
The client requested a sedum living for the top of there extension . The roof already had a rubber roof covering. The plants came in a pod system that just clicked together, and needed cutting in around the skylights.


Bradford-on-Avon
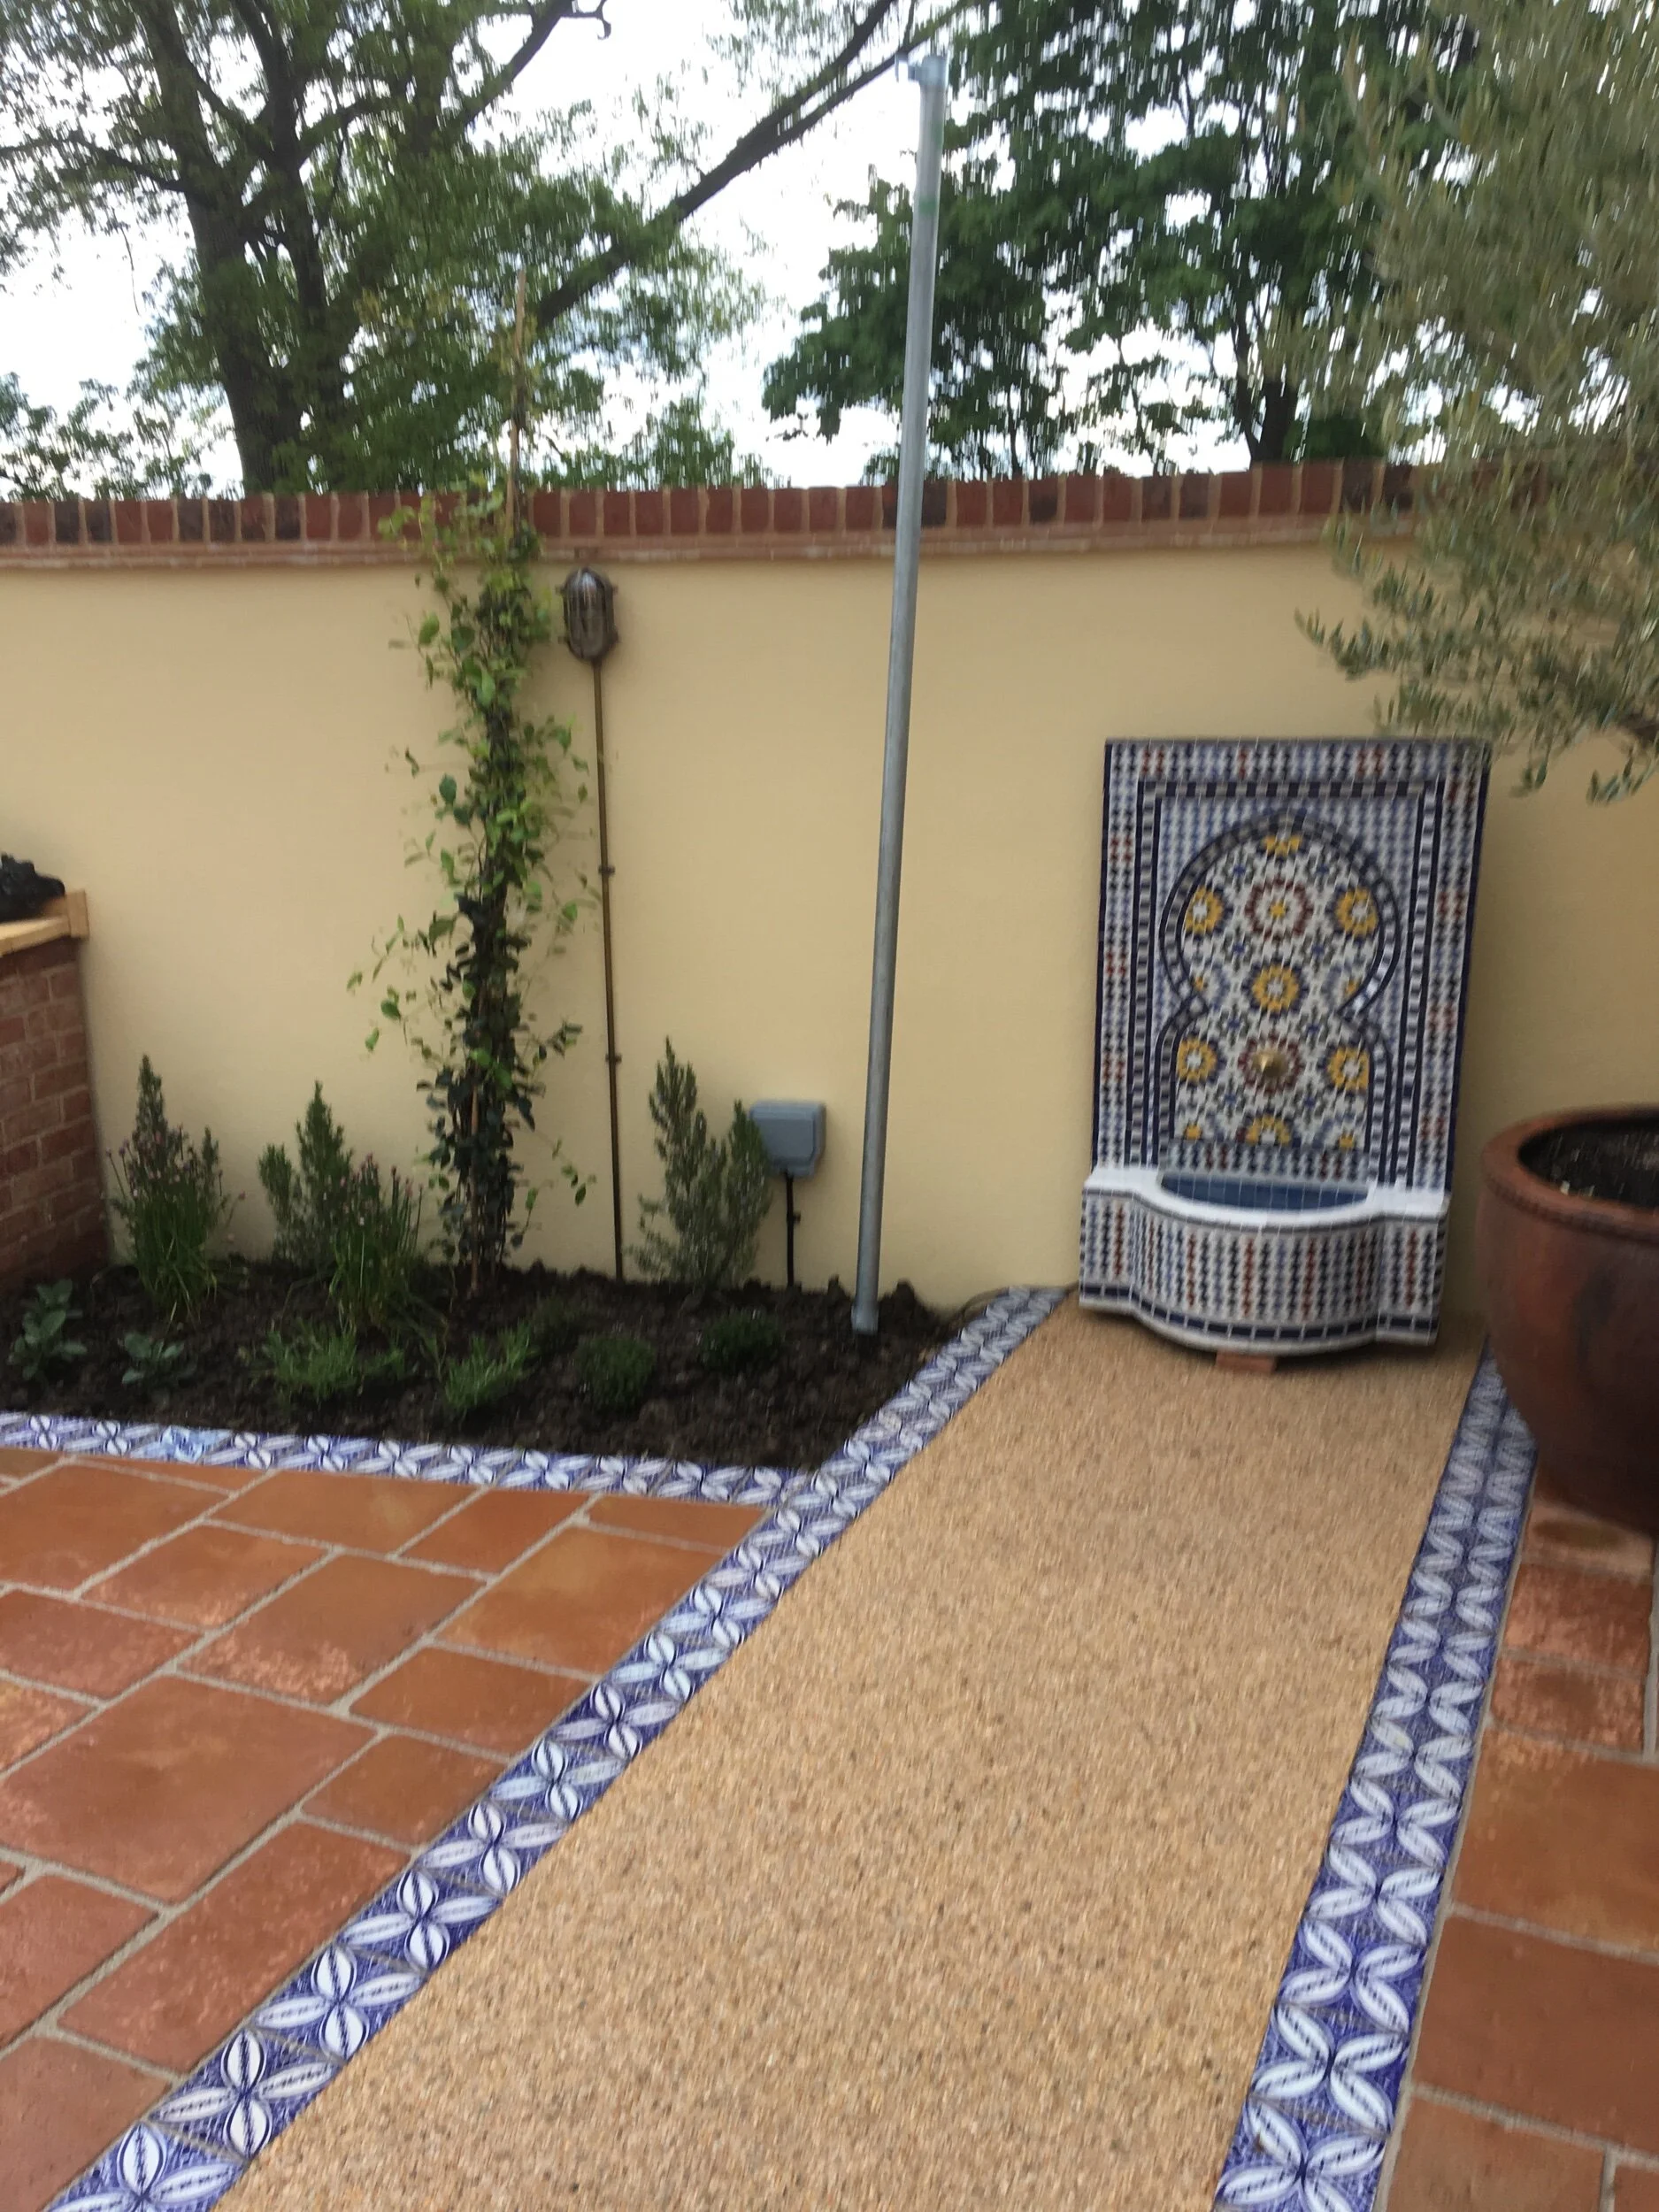
This project was a complete makeover in a recently developed house. The client wanted a Mediterranean styled garden.

This project contained patios pergola and a pizza oven .


Here are the finished project photos.


Bath, Somerset (Phase 2)
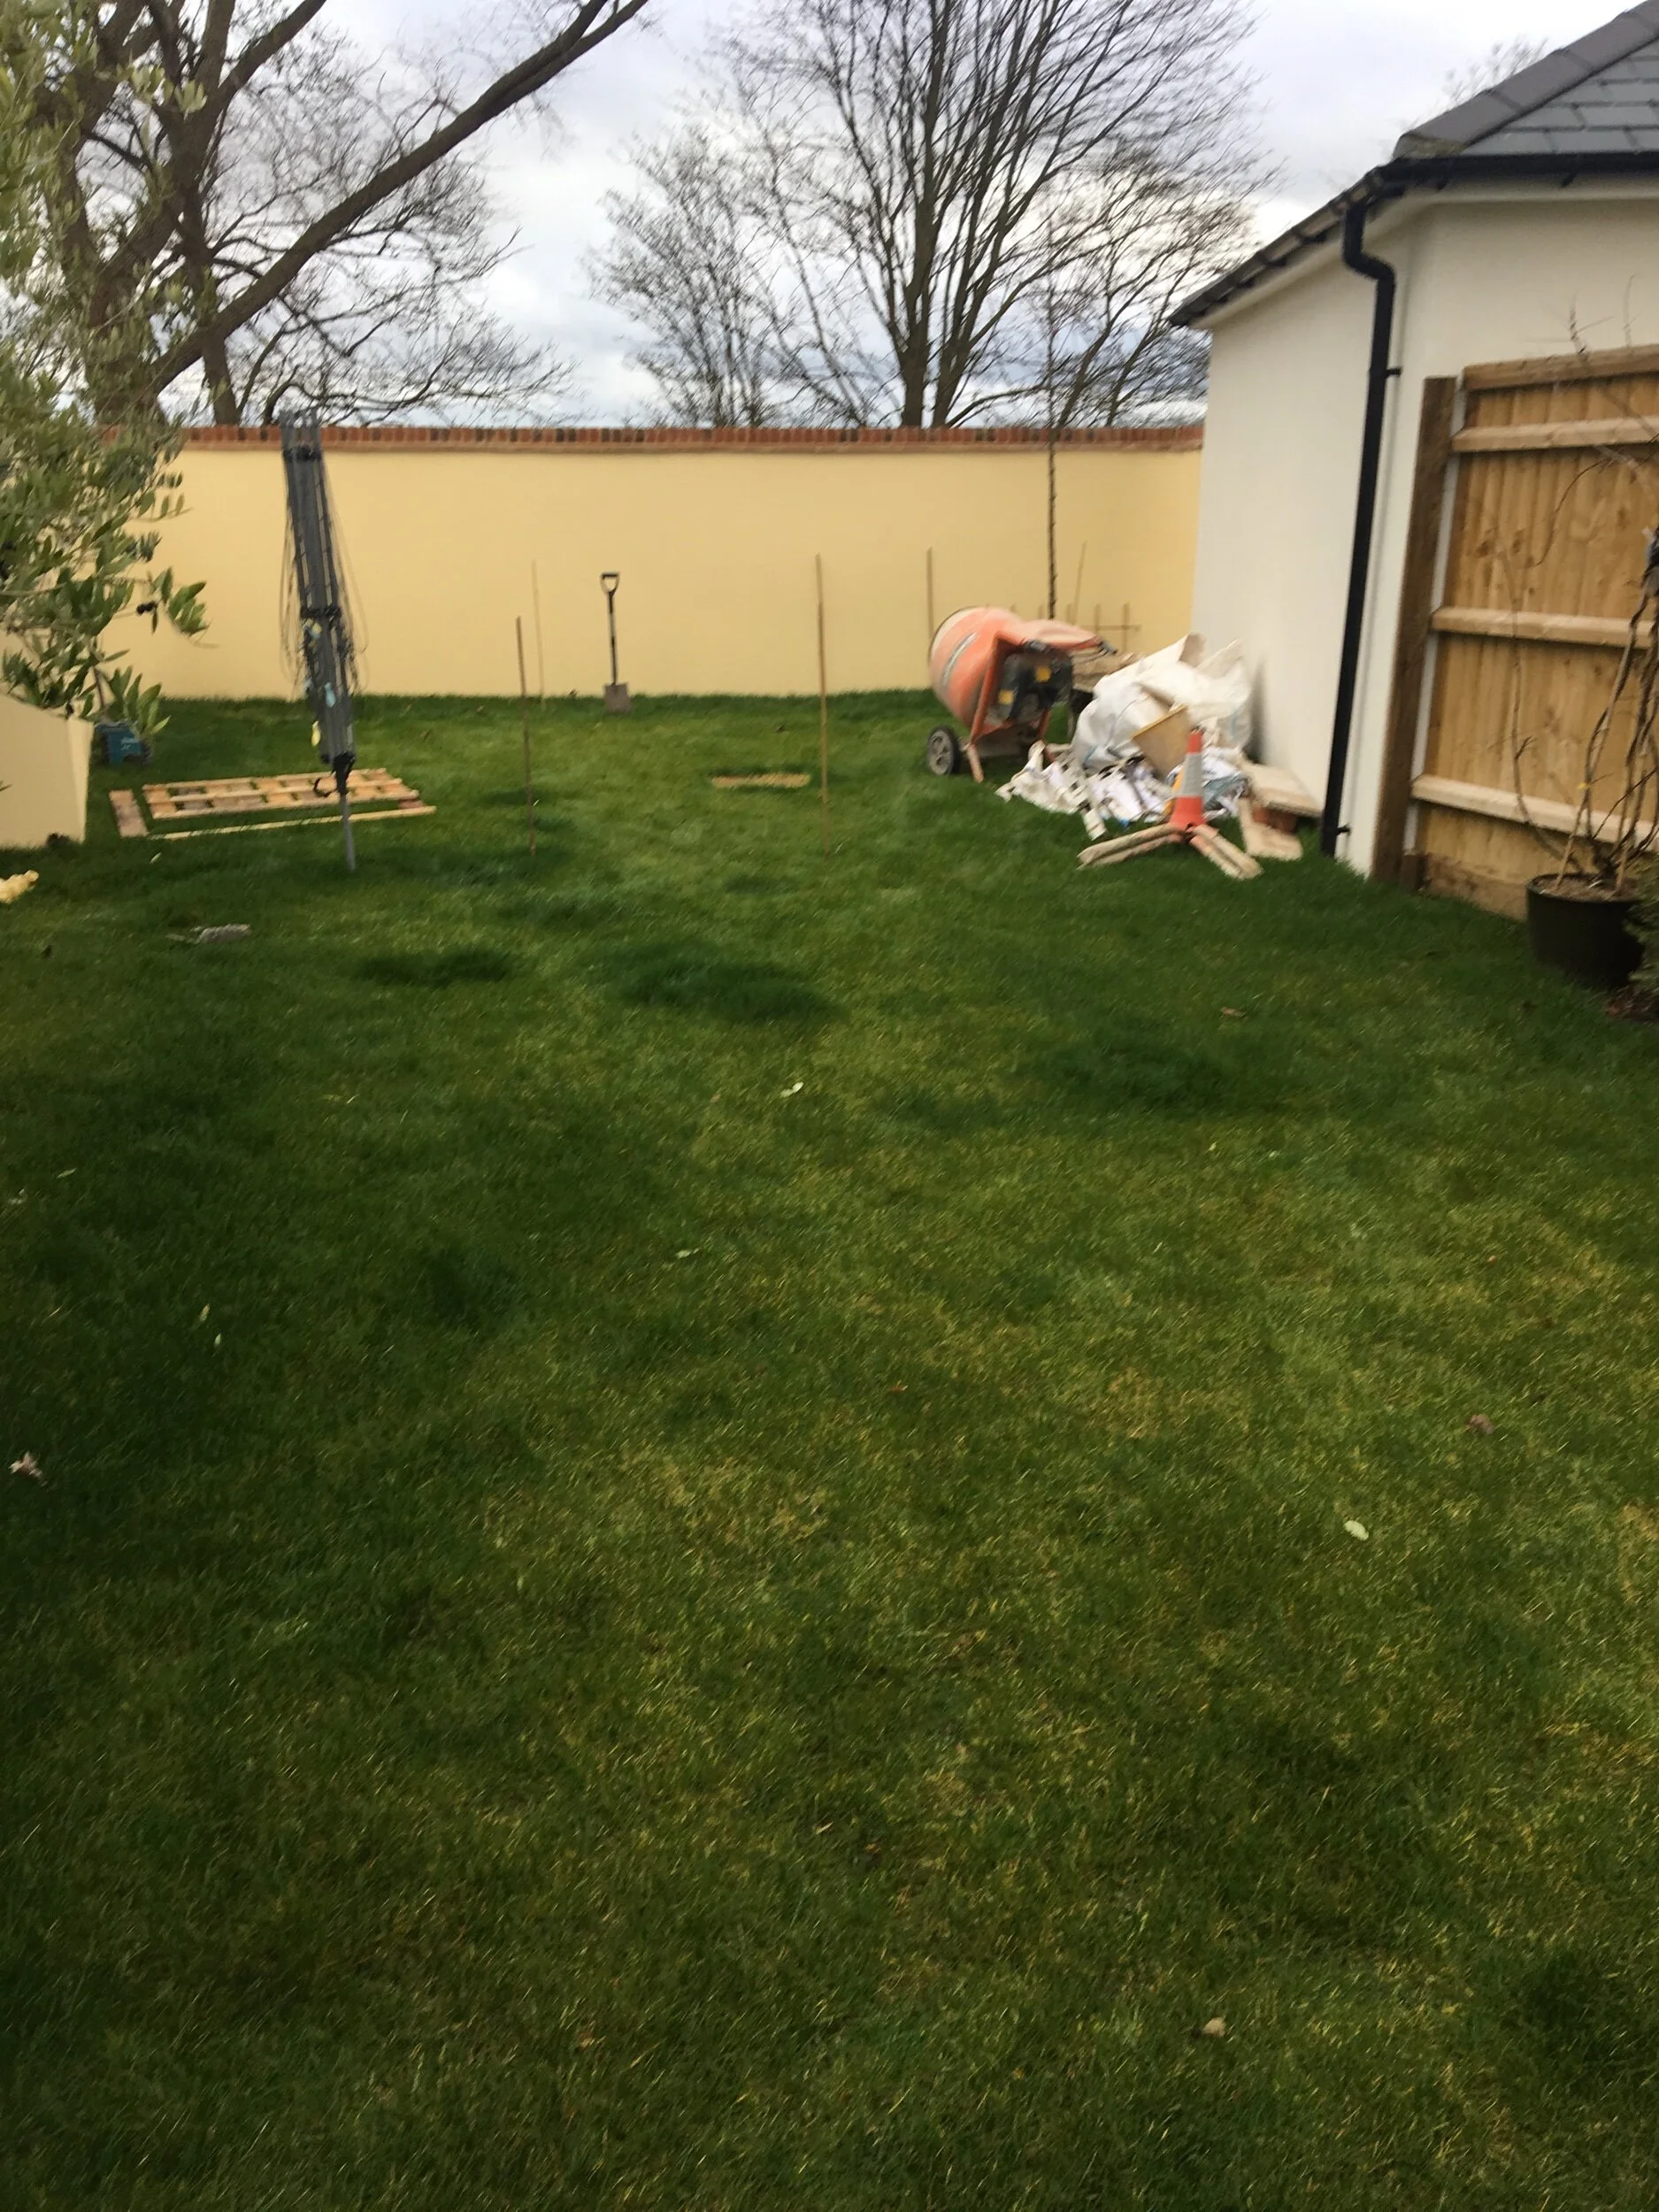
Back to this garden in Bath for Phase 2 to take up existing lawns and construct a pergola over a new pennant patio.

I started by removing the existing lawns and excavated the area ready to lay down compact scalping which would provide a solid base for the patio area. Next was to construct the pergola over the patio area where the design was implemented to the clients requirements. The paving was then laid in a random pattern on a sand/cement mix which was also pointed with sand/cement mix .
The lawn areas were cultivated and levelled and prepared for turfing. The turf used was Rolawn Medallion turf, which is very good quality and also very durable.
The Garden is now complete with a new lawn and patio alongside the raised beds and steps constructed last year .


Corsham, Wiltshire
Back to Corsham for phase 2 of this project. The first phase was to lay paths and patio around the back and side of house in Bradstone Fossil Buff sandstone paving.

Forward 12 months and now ready to commence on phase 2. The garden has been extended to incorporate some out buildings. The first job was to repair the dry stone boundary wall which had fallen down. I stripped back the wall too solid stones and then the rebuilding begins, it's a bit like doing a puzzle getting all the stone to fit nice and neatly together. This picture shows the end result.
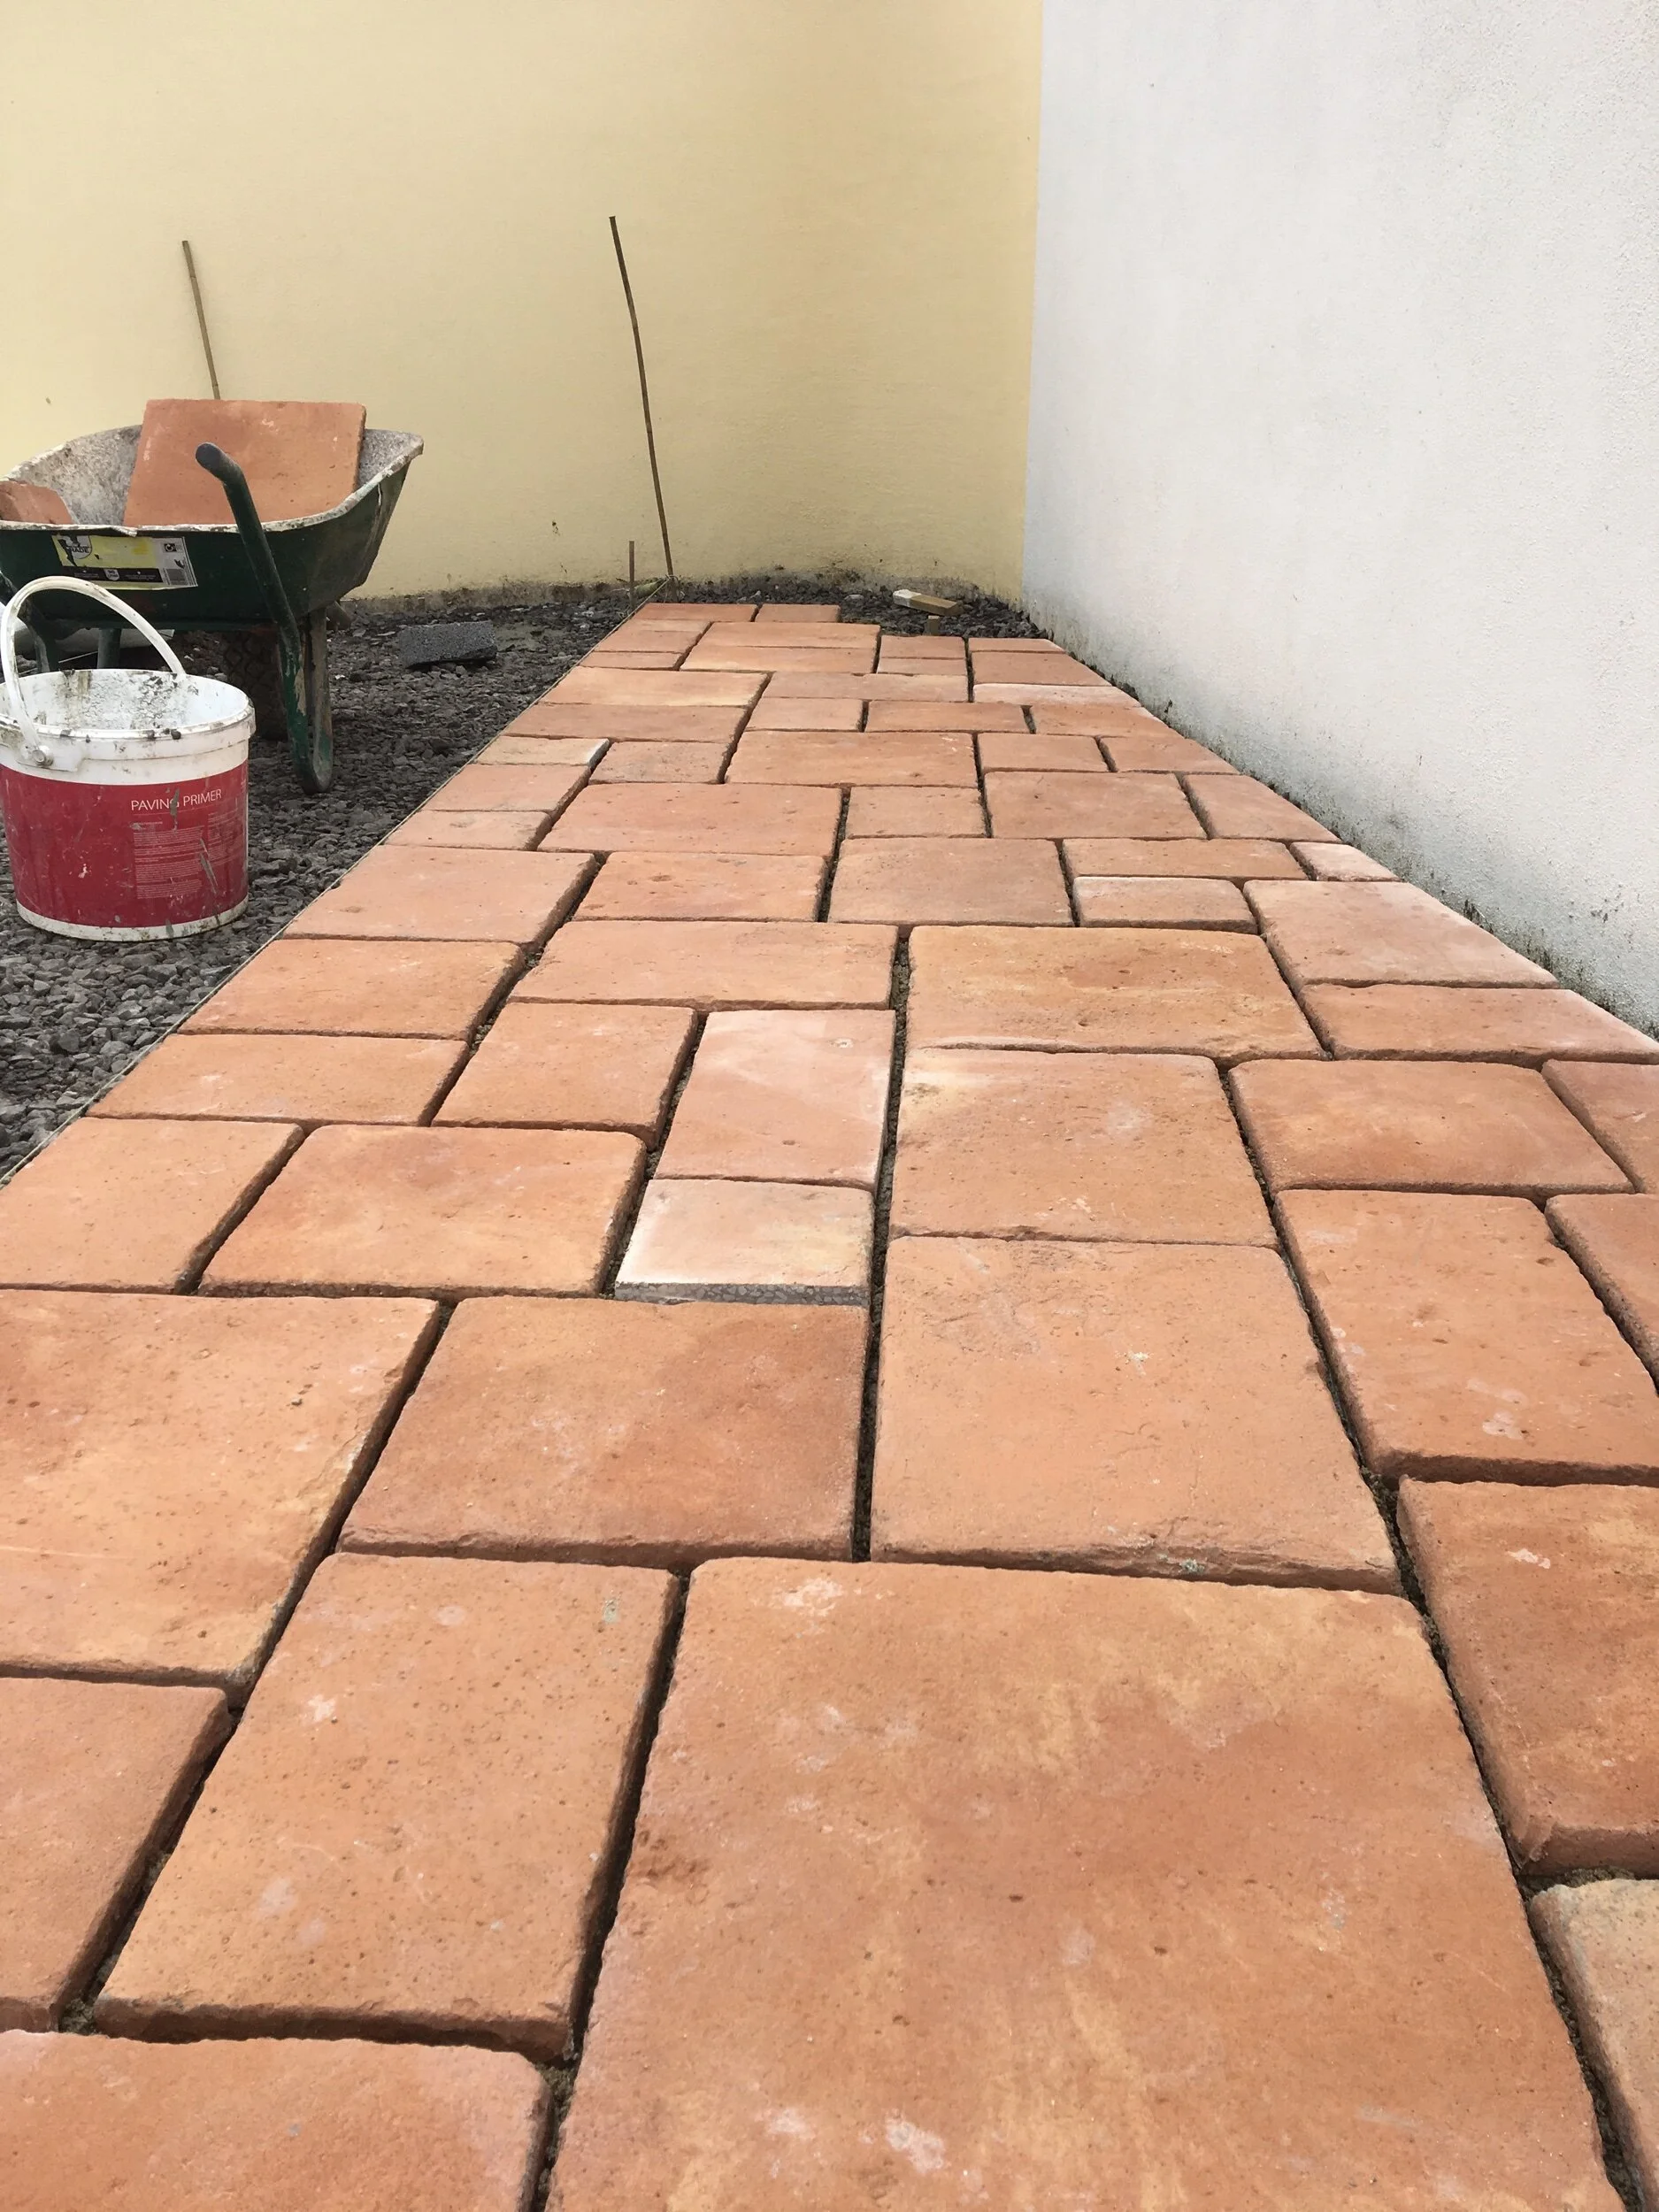
Due to acquisition of some out buildings on the land, a large patio area was laid at the back of these buildings using Fossil Buff Sandstone. This was laid upon a compacted scalping base using a sand/cement mix. The patio was pointed using a sand /cement with mix a white cement to create a colour to complement the slab colour.
A smaller patio was laid around the corner of the out building using the same materials and methods. The wall by the smaller patio was in need of repair, this was done using stone and a sand/cement mix, once this was done a coping was added to the top of the wall to protect it from the elements. I used 600mm x 600mm paving slabs laid on a sand/cement mix and pointed.


This is the end of phase 2 now the planning for phase 3 has begun.
Winsley

This was a little project which involved filling in pond and to create a water feature that would give the sound of water but not with the mess and danger to children.
We started by draining and clearing all the plants and fish out of the current pond. The liner and the protective membrane was removed then the hole was filled in and the sump for the new feature was sited and secured into position. Scalping's where brought in and compacted to levels just below existing patio.
Once the prep work was complete it was time to manoeuver the new water feature into position and connect the pipe to the pump in the sump. The last final steps included checking the flow and pressure of water through the feature and to dress the area with gravel and cobbles .
Here are some before and after photos:


Cornbrash Rise, Hilperton
in Decks
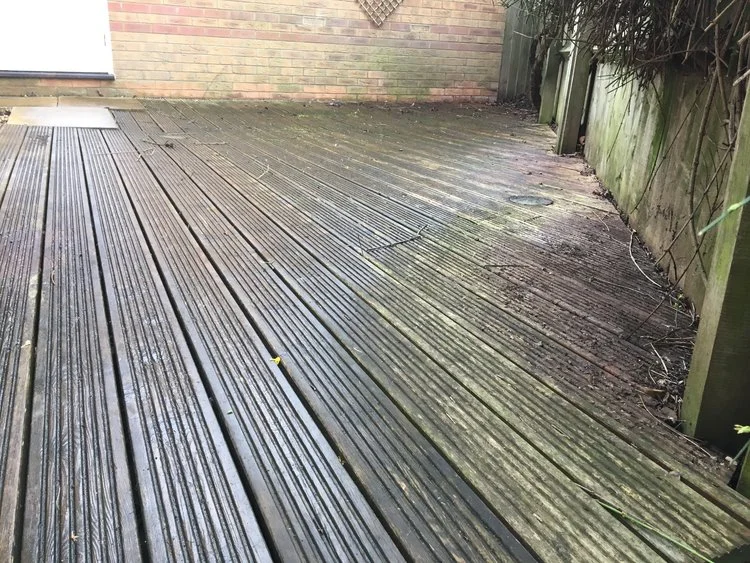
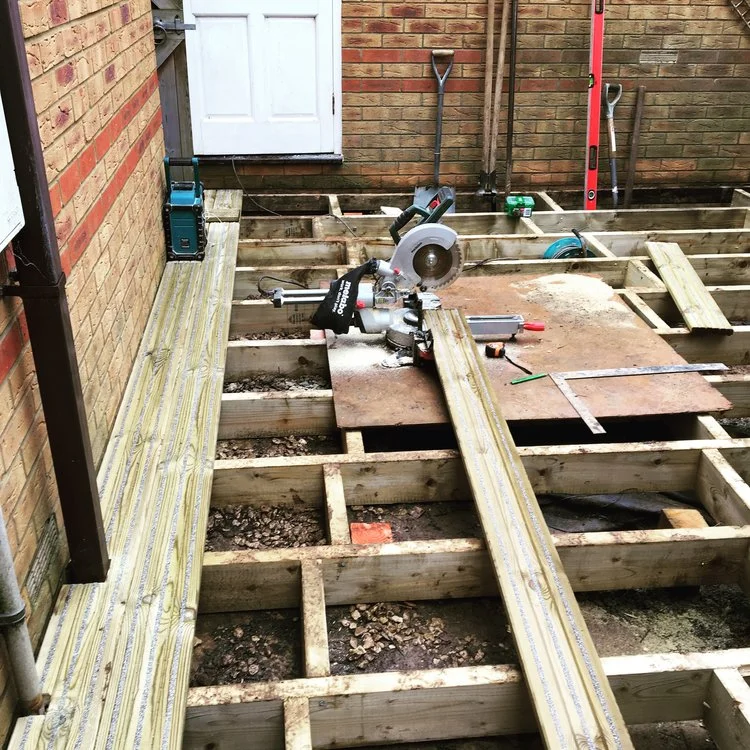
On this project the existing deck was sunken slippery and rotten in areas. The client called me to sort out there problem deck which had become very slippery and dangerous, so I began my research for using either composite decking or anti slip decking.
Composite is manufactured from recyclable materials and is a good anti slipboard, this has very good guarantees however this option was costly and above the budget of this project. The next choice was the anti slip board with inserted anti slip strips, this has good guarantees also and was in cost effective. Grey anti slip strips can be seen in the picture on the right.
I upgraded the frame by using 150 x 50 mm joists and secured to posts concreted into the ground and fixed the boards down with Spax decking screws .
Here are before and after photos, feel free to leave your comments and share!!!


Hilperton
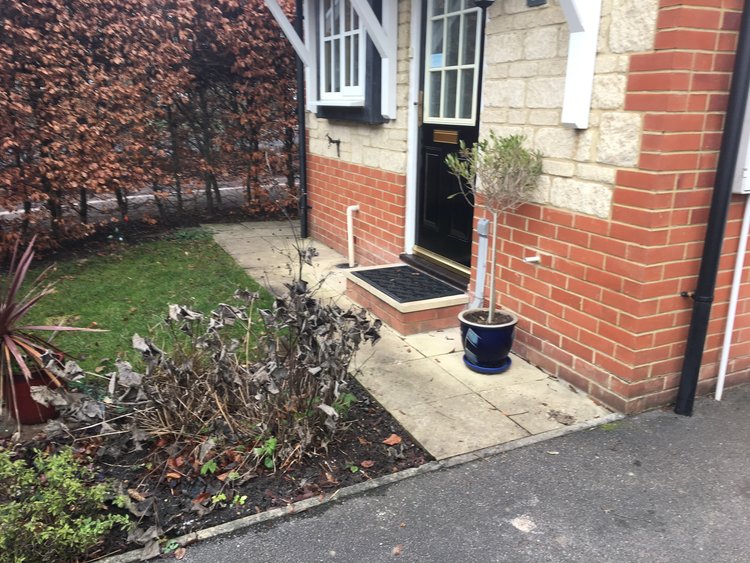
This project was a complete garden makeover .The clients had a design for the garden with a few set requirements they wished for. As the existing lawn sloped towards the house they requested a level lawn, the shed base extended and the garden terraced. The brief was to lay a patio at the back of the house with steps and a path leading to a small seating area at back of the garden. Then a path leading around the side of the house to the front door. The choice of paving used was sandstone light grey.

The first job was to remove the old grass and then lift all the old paving. Then excavating the areas that were to be paved ready to put down a compacted scalping base. The paving was then laid on a sand & cement mix, with the steps constructed and the upper path and seating area laid. To finish a dark grey pointing mix was used to complement the slabs.
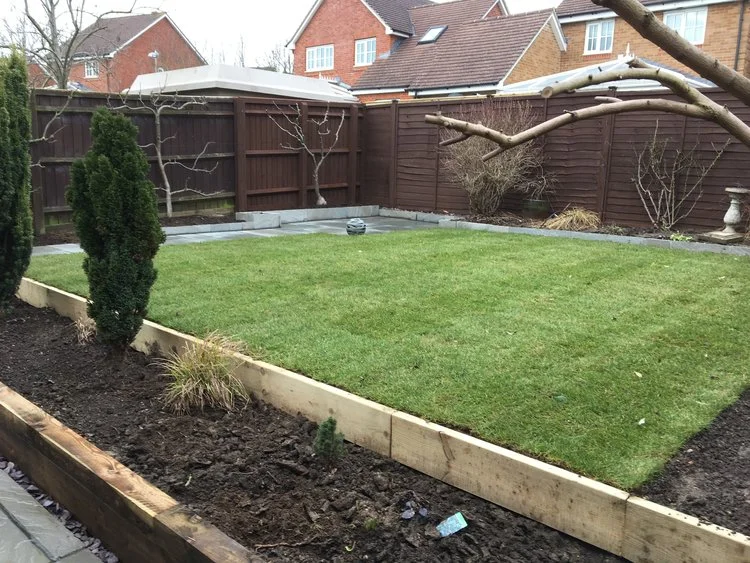
The sleeper retaining wall was constructed by fixing the sleepers to posts set in the ground as was the wood used to retain the lawn. This was constructed to level the lawn as requested by the client. Creating a level lawn brought about a new set of problems being that the soil beside the upper path and seating area was higher than them, this was overcome by using the paving vertically to retain the soil. The paving was used to bring a uniform look and achieve the request of not much wood being used.
The soil which was excavated from the patios and paths and piled in the garden was levelled to the new edges of the new lawn. This was levelled and prepared for turfing using Rolawn Medallion turf.
On this project I had a mixed bag of weather from sunshine, freezing cold, wind and the rain!


Bath, Somerset
in Walls
This project was a challenge and something to get your teeth stuck into!
The client requested that the existing set of steps and terraced beds were removed as they did not like the style and positioning of them. The brief I was given was to construct a set of central steps and uniform terracing out of Bath stone in random sizes.

The walls were constructed with a 100mm concrete block backing wall and then faced using the Bath stone random sizes jointed with a sand and white cement mix . The steps were formed with Bath stone risers and capped off with a pennant paving replica.
The challenging part was calculating the number of steps to connect the two levels and tying in with the walls .The client asked me to link the steps with the existing path by adding paving across the bottom of the lower wall , for this pennant paving was used .


Trowbridge, Wiltshire
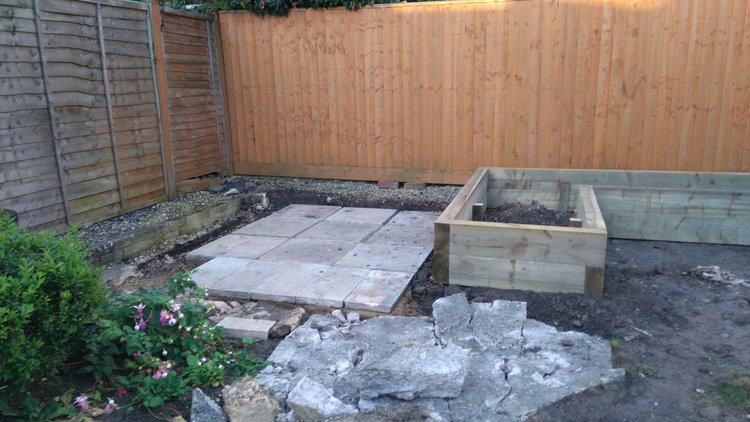
This project was a complete makeover with client designing the garden to her own personal needs and wishes. The design was in a layout form with no measurements, so my first job was to make sure it all fitted into the garden!
The existing lawn was removed and put to one side as this would come in use later on in the job. Construction of the raised beds was next, these are 2 sleepers high with a 50mm topper which acts as a wider top and seating area. The sleepers are secured by putting wooden posts into the ground, concreting these in and securing the sleepers with coach screws. Some of the stripped off grass from the existing lawn was then used in partially filling the raised sleeper beds, which over time will rot down once the topsoil is placed on top. The soil from the excavation of the patio area was used to do this.
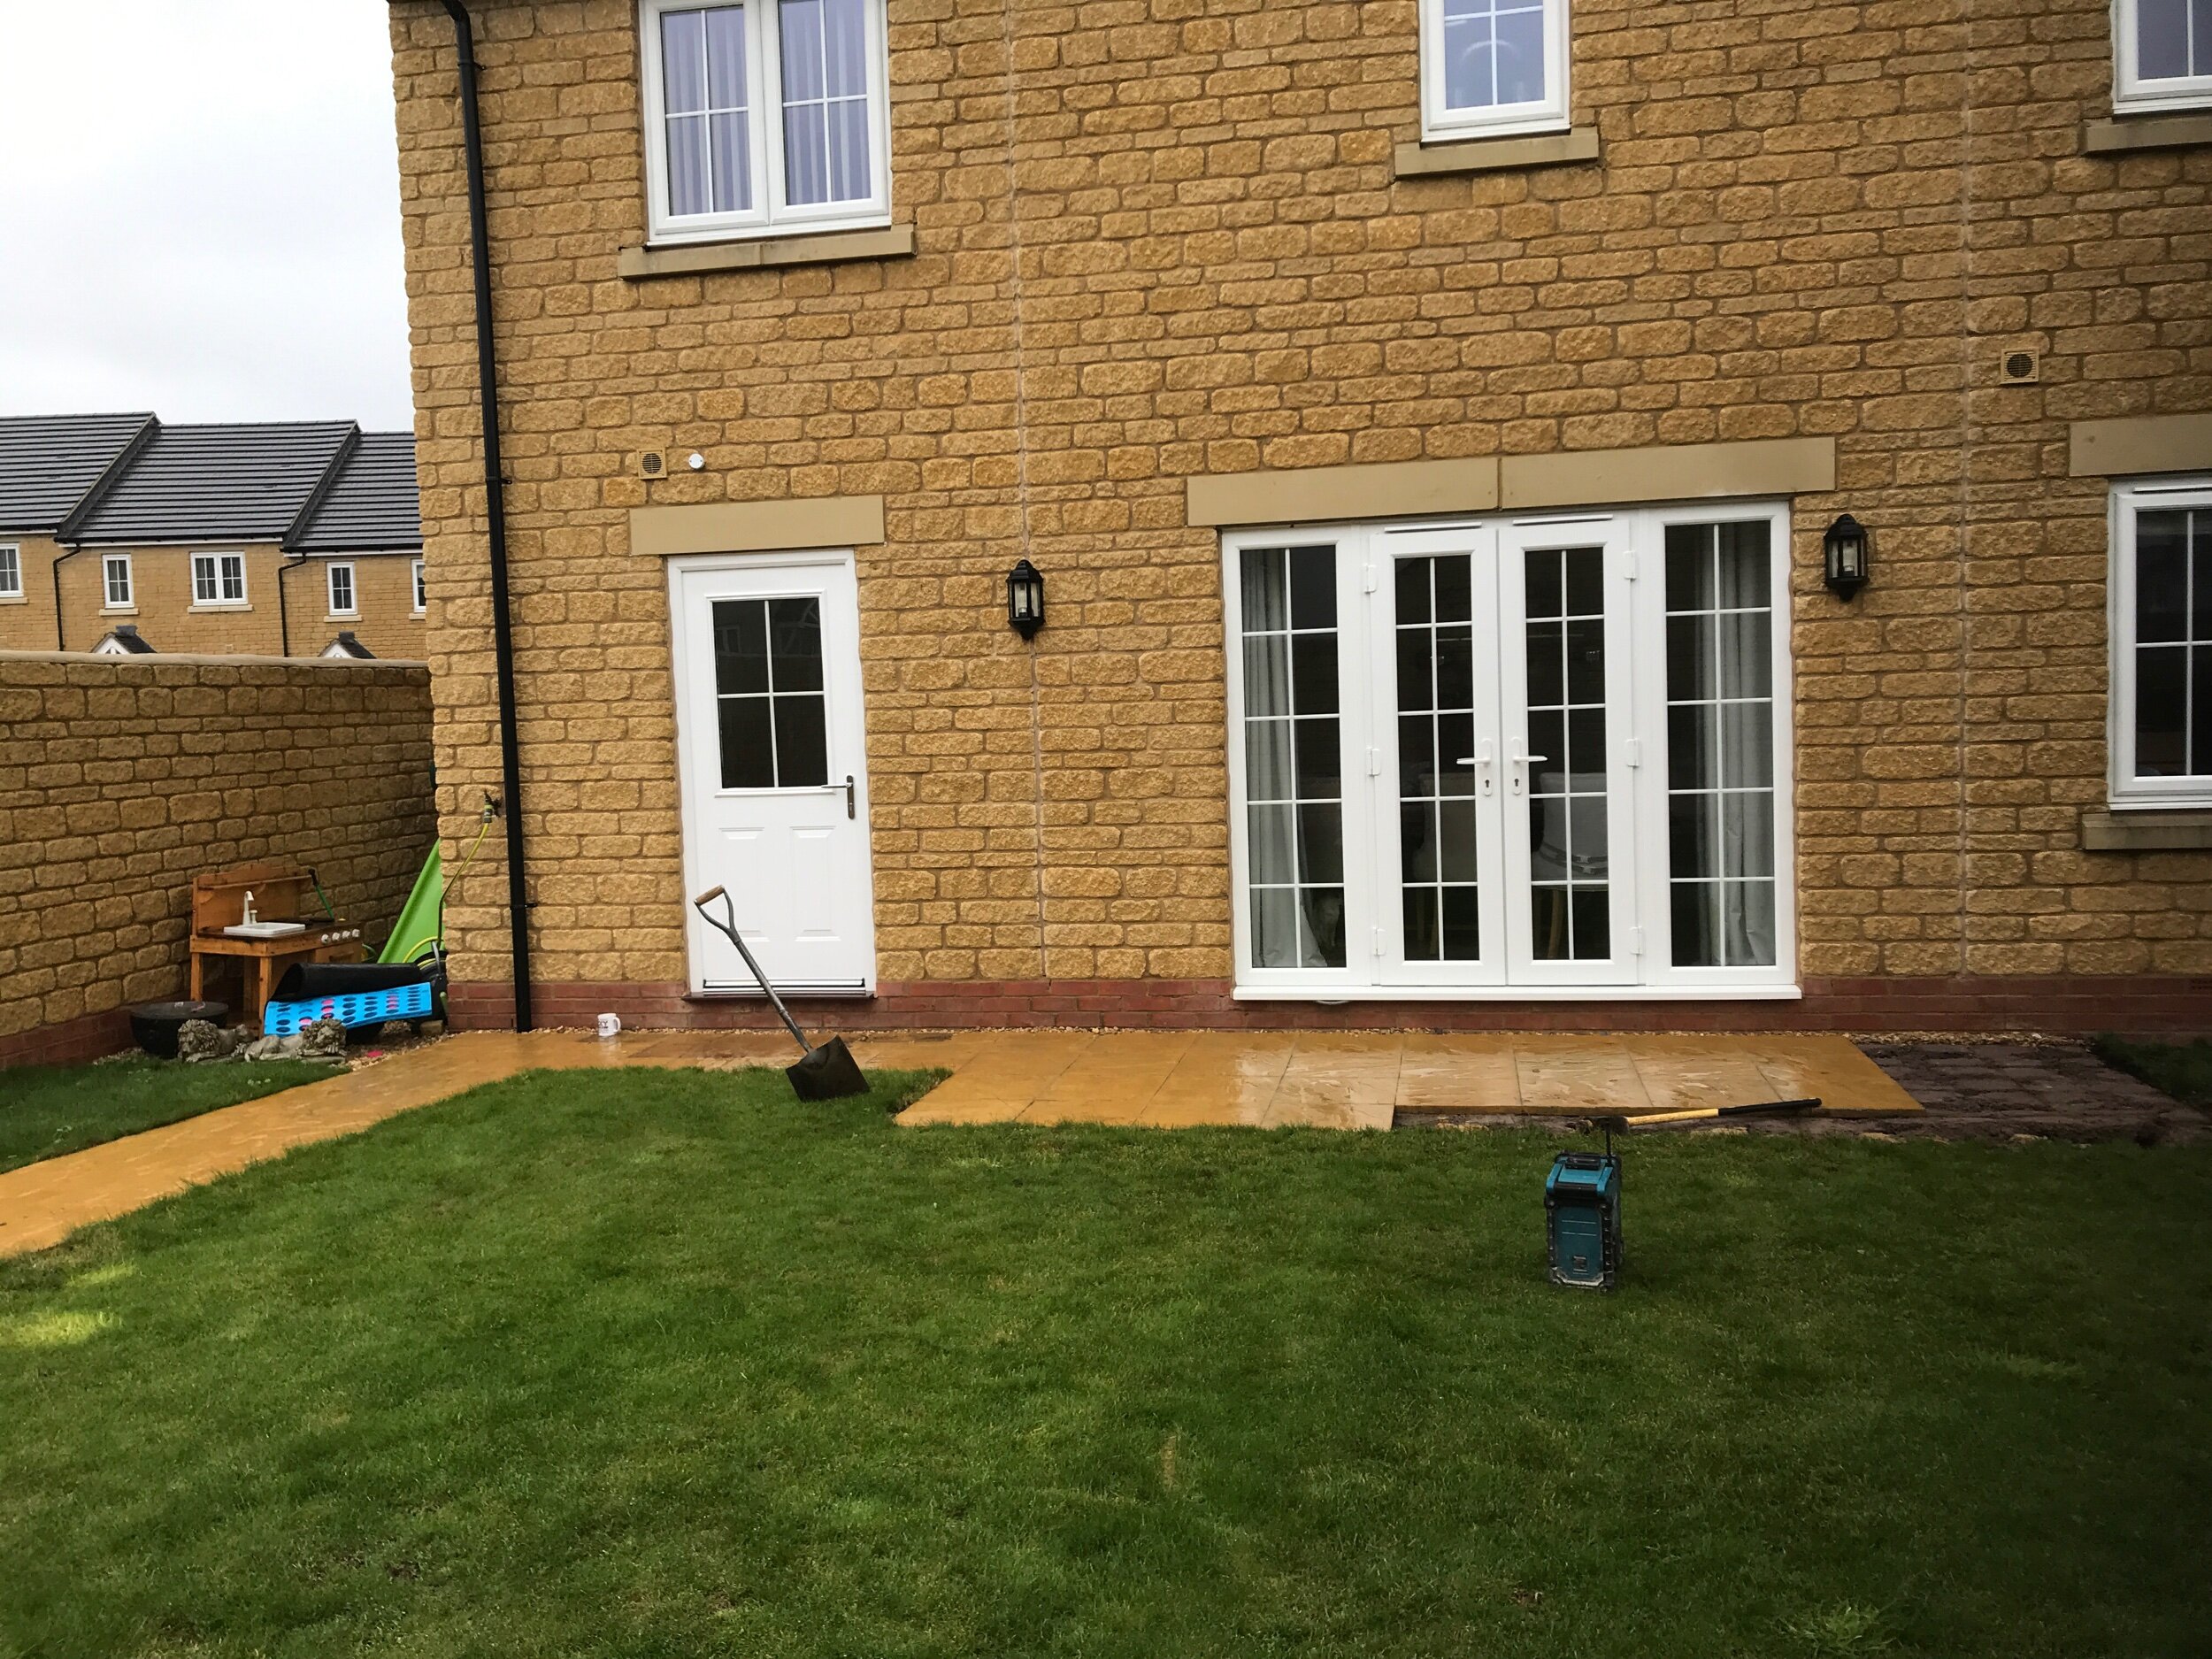
The existing concrete paths were broken up using a hydraulic kango and the concrete was used to provide hardcore for the patio area. This was done to provide a solid base which will stop the patio sinking as well as extending the life of the patio. The base was then capped off with scalpings and compacted with a wacker plate. The client requested textured paving for the patio area so we went with Bradstone buff textured paving in 3 different sizes in a repeating pattern. These was laid on and pointed using a sand/cement mix with white cement to get the pointing to complement the slabs.
Around the intended new lawn area metal edging and block paving was used to retain the topsoil. The block paving was used in front of the raised beds to provide a mowing strip, this allows you to get a nice clean cut edge by the sleepers, when mowing the lawn. Metal edging is great because it is very flexible and allows you to create neat curves for edging turf or boarders. Over 3 tonnes of top quality topsoil was brought in to level the lawn area, this was then turfed using Rolawn Gold Medallion. Before the turf was laid a starter fertilizer was put down this promotes good root growth which is vital to the turf surviving .
Landscape matting was put down over the pathways, this will stop weed growth in the gravel areas. The gravel used in this garden is 20mm Romsey, this was chosen because it is large enough not to get stuck in the tread of your shoes or boots and get brought into the house . The shed and bench were constructed from kits and they completed the garden. I was very lucky to have the weather on my side especially for moving the soil. This garden is now ready for the client to start planting and to enjoy!